Easily Generate System Performance Report In Windows 10
Windows System comes packed with useful tool to monitor the performance of the system. There is a build-in tool called ‘Performance Monitor’ which is very useful to generate reports and view them in order to check the performance of the system. Most of the users don’t know this feature, that’s why we are showing the detailed steps on how to use Performance Monitor in your Windows System.
Its an old tool which works very well and also available in Windows 10.
How To Generate System Performance Report In Windows 10
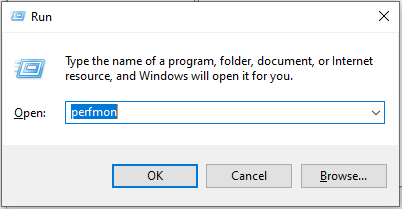
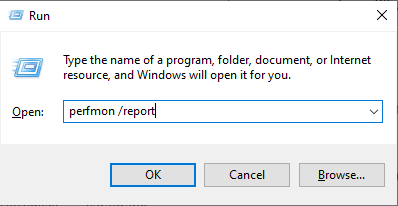
Step 1: We will open Performance monitor tool. To open in either you can type ‘Performance Monitor’ and it will show performance Monitor in results, or you can use Windows run command to open it. To use run feature, Press Windows Key + R key and write ‘prefmon’ there.
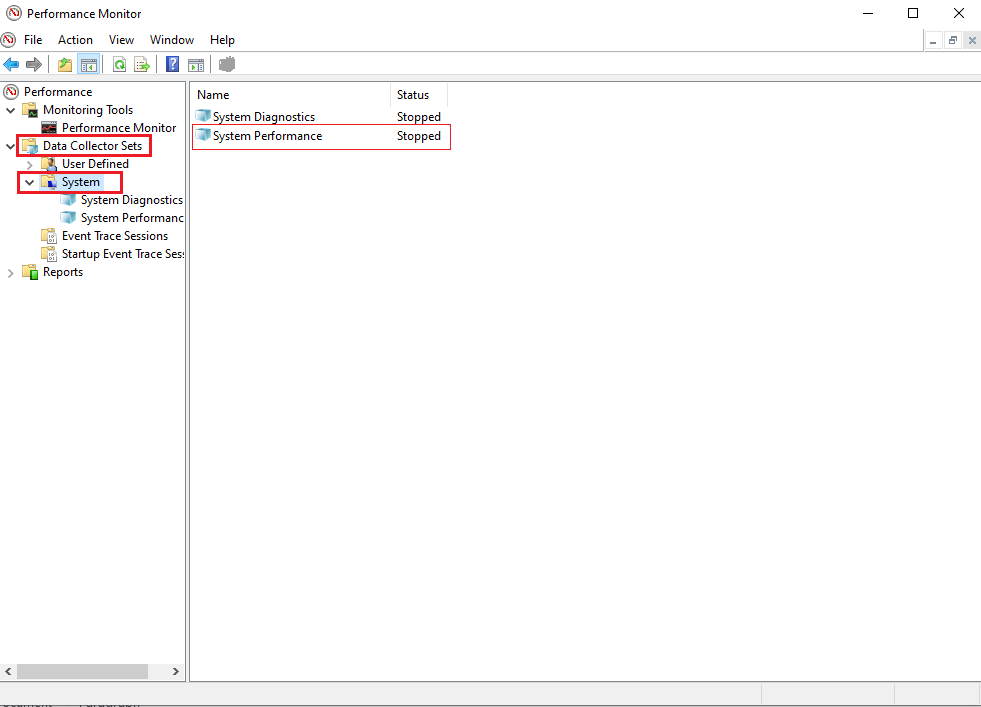
Step 2: After Opening this tool, in the left hand side menu, navigate to this location: Data Collector Sets => System => System Performance.
Step 3: If you are using it first time, so most probably it will in stopped state. Right click on it and select start.
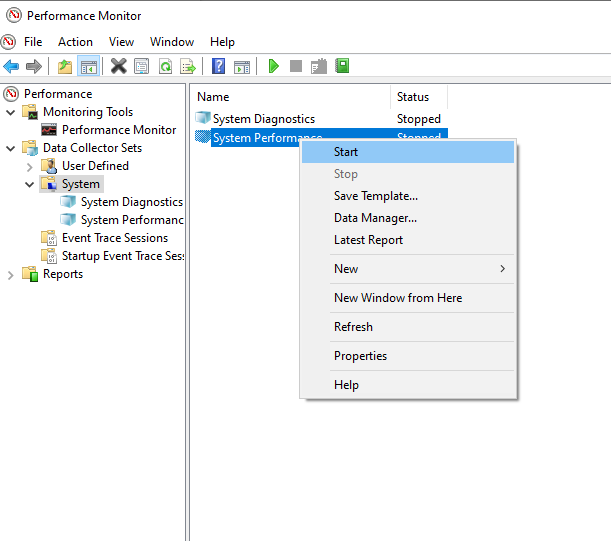
As soon as you select Start option, it will change the view to below:
Notice the little green play button.
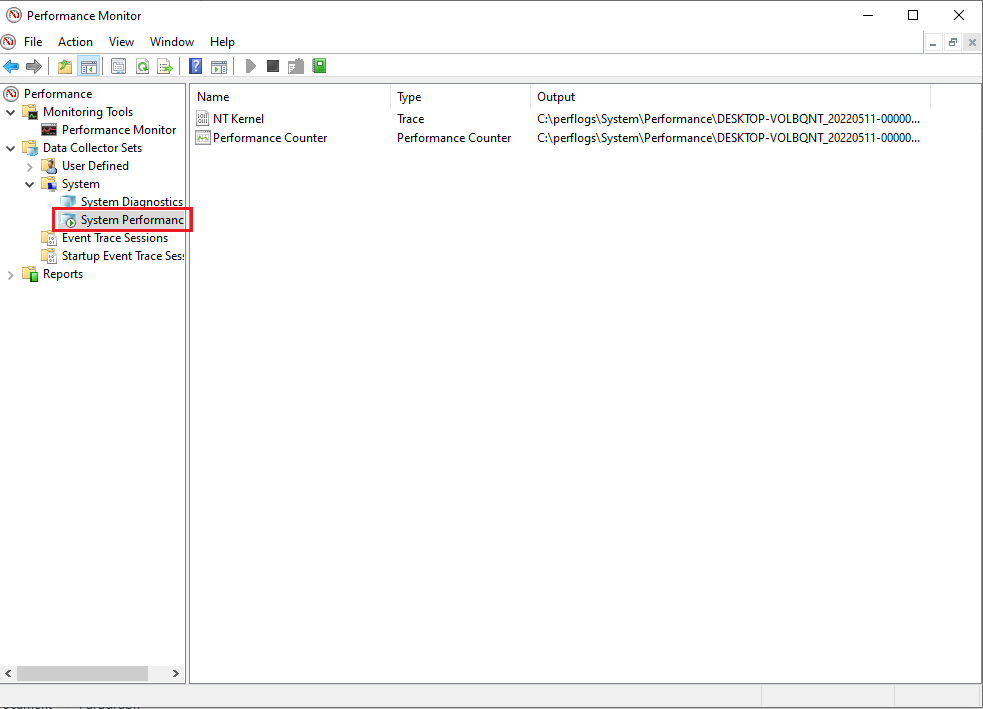
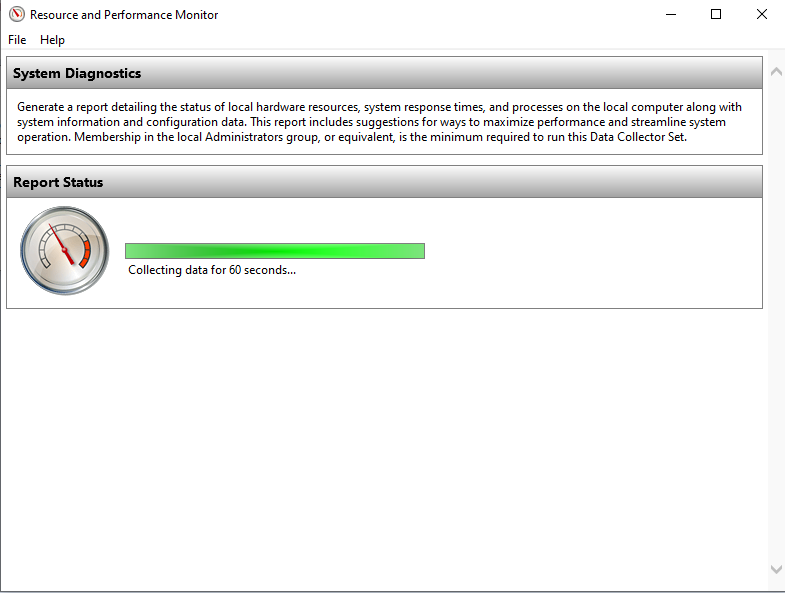
After this process is successfully started, window will start collecting data from last 60 seconds in the background, result of which we can see from reports section.
Productivity Tip: We can fasten this process by combining all these 3 steps on one step. In step 1 instead of typing ‘prefmon’, you can type ‘perfmon /report’ and it will start the report generating process. (There is a space between perfmon and /report)
After that it will open performance monitor and it will below screen, which show that it has started to collect the required data and will show message like “Collecting data for 60 seconds”.
How To Check System Performance Report
Using the Performance Monitor tool, you can view the generated reports. After opening this tool and ensuring that System Performance is enabled and running, as shown above, Navigate to Reports => System => System Performance (as shown below):
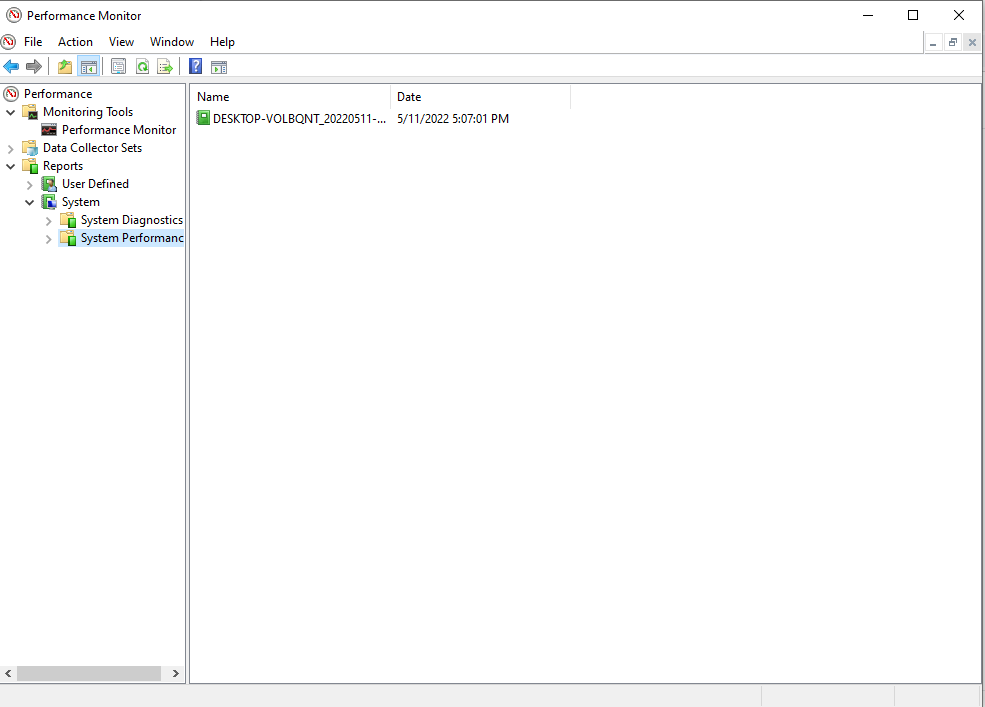
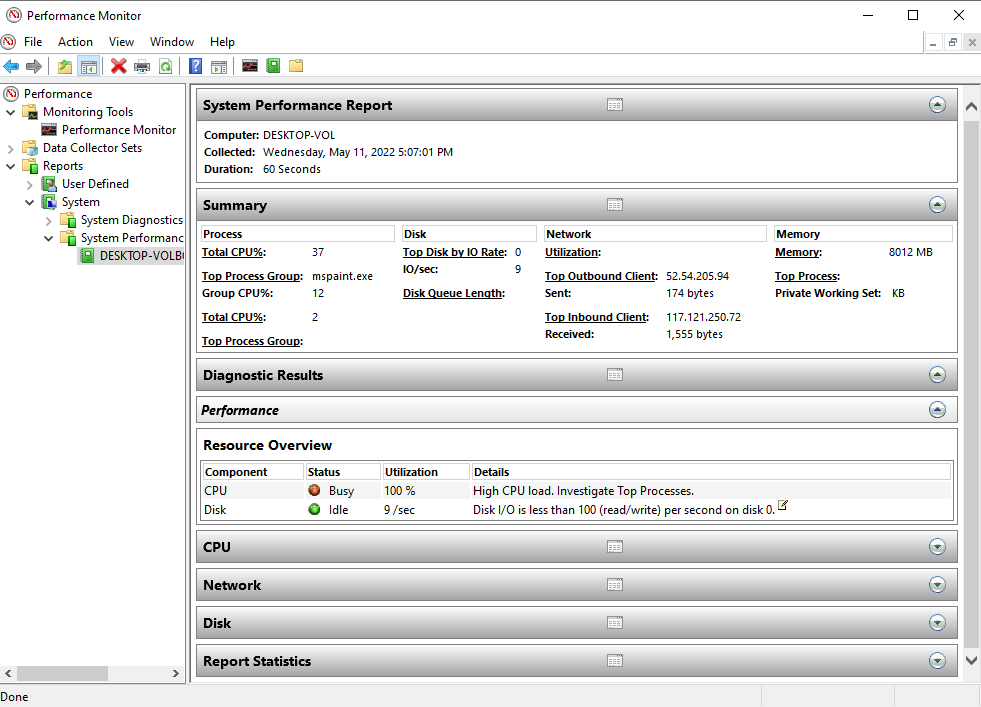
It will list all the generated reports. To view a report, all you need is to double click the one you want to view.
Conclusion
Here we saw that how easy it is to generate and view system performance report in Windows 10. I hope this was a useful information for you. If any question then please put them in comments.
Leave a Reply